Thursday, September 12, 2019

Gather Together for Fall

It has been a very busy summer. Now the air is a bit colder and the leaves are turning yellow. Yup, it's just about time for Fall. Such a beautiful season of vibrant colours, how could you not love it! (Well except for the fact that it signifies the fast approach of winter, that is!) So in honor of this gorgeous season, I made this card. 
For inspiration in making this card, I followed this week's challenge from the Global Design Project team which happens to be a sketch challenge.
For this card my focus was on the beautiful Gather Together bundle. Again I used my brayer and ink pads to create my fall-colored sheet that I used for my die-cut leaves. (Please see my previous blog post for more info on this technique:) ) Here I used Mossy Meadow, Crushed Curry and Cajun Craze ink pads.
I used the coordinating Gathered Leaves Dies to die cut my leaves out of this sheet and some Gold Foil sheet as well. I also used my Starburst Punch on a piece of Kraft cardstock and then I sponged the edges of this with Soft Suede ink. My sentiment was from the same sheet that I created and stamped using Early Espresso ink pad. My mat piece is a 4" x 5 1/4" Mossy Meadow cardstock that I ran through my Big Shot with the Pinewood Planks embossing folder. And lastly I also added a strip of the retired Wood Textures DSP into the mix.

So I just put everything together, fanning my leaves out and adhering some with dimensionals for additional layer. For embellishment I used the coordinating Come to Gather Ribbon pack and made a bow with the Cajun Craze linen thread, and then added some Iridescent Sequins for some shimmer. 

And that is my fall card for today. I hope you liked it and hope to see you next time. Thanks for stopping by, happy crafting!


Tuesday, September 10, 2019

Fun-filled Snowman Season

Ever since I got my pre-order for the Holiday Catalogue, I cannot seem to stop playing with my Snowman Season bundle! These snowmen are just so stinkin' adorable! So in a rare opportunity that I am actually able to do a blog post, I'll show you how I created these cards...
Aren't they just adorable??! I had tons of fun creating these cute cards. Here's how...

I started by making my background piece...it's simple. I just taped a piece of Whisper White cardstock onto a board and used my brayer to deposit ink onto my paper. I used Melon Mambo, Balmy Blue and Night of Navy ink pads.
Then I sprayed LOTS of water onto my paper to spread the ink around. It'll look something like this...doesn't look much right now but just you wait!
Next I dried it with my heat gun. This is why you need it taped onto a board...so that your paper doesn't warp during the drying process. Then I sprayed it with some white ink and this is what you'll end up with...
Now to make my card I stamped and punched out my snowman with coordinating Snowman Builder Punch. I also stamped the smallest snowman in a piece of Whisper White cardstock and then fussy cut it. Next, the hills...I cut out a wavy line 1/3 of the way down a piece of Whisper White cardstock (4" x 5 1/4"). I lined this up against another piece of cardstock to eyeball the height of the next hill...it should be high enough to fit my hat-and-scarf snowman. Then it's just cutting up another wavy line going the other way this time.

I then stamped the hat-and-scarf snowman onto the bigger piece of hill and then colored my snowmen in using my Blends. Next I lightly sponged the edges of my hills with Balmy Blue ink using a sponge dauber

To assemble I glued the back hill onto my background piece that's 4" x 5 1/4". Then I mounted the front hill onto the second hill using dimensionals. Next I glued down the smallest snowman at the back and then added my punched-out snowman at the front. Lastly I white heat-embossed my greeting at the top of my background piece.

I mounted this whole piece onto a mat layer of Basic Black cardstock before adhering the entire thing onto my Whisper White card base. For some shimmer I covered my hills in Wink of Stella and then added some snow with Crystal Effects and Dazzling Diamonds

And that is my card for today. Kinda hard to explain the steps, but hopefully you were able to follow my method to the madness :)  I was hoping to do a video on how I made these, but that will have to wait for now. Thanks for stopping by and hope to see you next time. Happy crafting!!!


Monday, August 12, 2019

Pigment Sprinkles Fun

So I know I'm late in the game, but I just recently got to play with my Pigment Sprinkles. And seriously, I don't know what I was thinking waiting this long! These crystals are a-ma-zing! Very much like Brusho, but waaaay better in my opinion. Extremely pigmented and vibrant and gorgeous colors, I just loved experimenting with them.

There are lots of different techniques on how to use these sprinkles. One thing to remember with these though is that a little goes a long way. Seriously. You should've seen the mess I made the first time I played with these pigments.

Anyway I tried to think outside the box and today I added my sprinkles onto my texture paste and used some of my masks. I was originally going to use my embossing paste, but unfortunately it has dried up so much that it is hard as a rock so that's a no-go. I'm pretty sure that you will get pretty much the same results using either embossing or texture paste, so just use what you have.

Here's what I ended up with...
Aren't they so much fun?! This was so addictive, I had to force myself to stop. The texture paste muted the colors a little bit I think, making it look more pastel-like. This of course depends on the amount of pigment you use. I also like the ombre-effect it gave me, resulting in a DSP-like paper with the additional texture. How cool is that!? Some tips...don't over-mix your paste. This way you get lots of different colors on your piece. Also try to pull (or push) the paste from different directions so that you get a 'movement effect', if that makes any sense. And lastly, just have fun with it! :)

Here's the finished cards I created using these beautiful pieces. I had an accident with my last piece so I was only able to make these three cards. I'll do a more up-close look on how I created these in my next blog posts. 
Wasn't that just lots of fun!? Now I can't wait to get my new masks and play some more! And oh yeah, a new bottle of embossing paste too! :)  Hope you give this technique a try and have lots of fun with it too! See ya next time. Happy crafting!

Sunday, August 11, 2019

Floral Essence

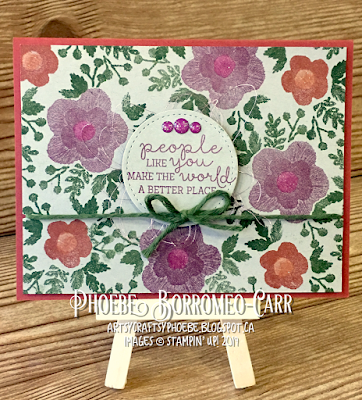
     It has been a while since I've done any crafting...life has just been too busy and crazy lately. And with all that time I've been away from my craft room, I seem to have lost my mojo. So what better way to get those creative juices flowing than a challenge, right?!

     This week at Global Design Project is a Color challenge.
With this color combination, I immediately thought that a floral themed card would work best. And so I came up with this card...
I stamped my flowers from the Floral Essence stamp set using Merry Merlot ink, then I spread the ink a little bit using my Aqua Painter. I then punched my images out using the coordinating Perennial Flower punch...I used four cut-outs to make one flower. I also added some Petal Pink rhinestone gems to the centers of my flowers for embellishment.

My leaves are from the same stamp set and are stamped in Mossy Meadow ink. I did some second generation stamping as well to get different shades of green. Then I used the coordinating Leaf punch to cut out my images. To tie in the Pretty Peacock color, I die cut my flower flourish from Well Written die set on a piece of Pretty Peacock foil from the Noble Peacock foil sheets. My sentiment from Beautiful Promenade stamp set is also white heat embossed on a strip of Pretty Peacock cardstock.

I used the Stitched Nested Labels die set to cut out my center frame in Whisper White and Pretty Peacock cardstock. Lastly, I used my Brick & Mortar embossing folder on a piece of Whisper White cardstock for my mat piece, which I layered on top of a Pretty Peacock cardstock. With a little fiddling and some floral arrangement, I ended up with this card!

I really enjoyed creating this card and getting back to my crafting groove. Hopefully this ends the lull and I'll have more ideas for my next projects. Thank you so much for stopping by and see ya next time! 

Thursday, April 11, 2019

OnStage Vancouver Swaps

Well it is that exciting time of the year again when Stampin' Up demonstrators from all around the globe gather together to have fun crafting time...OnStage! This year I will be heading down to Vancouver, and I am super excited! 

Card swapping is an important part of this event. You get to meet new friends and also get lots of cool project ideas from fellow demonstrators! So for my swaps this year, I needed something that would be easy to mass-produce. Here's what I came up with...
I decided to make 40 cards this year, in 4 different colors for additional fun! Here's a quick video of how I made these cards.
All my cards had a Whisper White card base (A2 size) and a mat piece of Basic Black cardstock (5 1/4" x 4"). To save paper I cut out the inside of my Basic Black cardstock and trimmed it to 4 1/4" x 2 7/8" for the layering piece, and then punched out the middle of it for my sentiment piece using the Everyday Label Punch.
I started by stamping my images on a piece of Whisper White cardstock (4" x 2 5/8") using my Memento ink, then I colored them in using my Blends in Poppy Parade, Bermuda Bay, Old Olive and Daffodil Delight. I used the stamp set Love What You Do for this. Moving on, I gold heat embossed my sentiment piece which comes from the same stamp set. Next are my butterflies from the Butterfly Gala. I stamped them on a piece of vellum with Versamark then gold-heat embossed them before cutting them out using the Butterfly Duet punch

Then it's just running my cardstock through the BigShot with the Country Floral embossing folder with ink on one side. For the green card I used Pear Pizzazz cardstock with my Mossy Meadow ink pad. I used Cherry Cobbler cardstock for the red card with Merry Merlot ink pad. For the yellow card I used Crushed Curry ink pad on my Daffodil Delight cardstock. And lastly for the blue card I used Bermuda Bay cardstock with my Coastal Cabana ink pad.

Finally it's just a matter of putting my card together. And as usual, I cannot have a project with no shimmer so I had to add some Wink of Stella on my embossed flowers. And those are my swaps, hopefully those who will receive them will like 'em! I must say that using my Stamparatus to create these cards was a huge time-saver! Mass-producing was a cinch! Thank heavens for our handy-dandy tools. Anyway hope you liked today's project and see y'all next time! Happy crafting!


Sunday, March 24, 2019

Vintage-looking Needle & Thread

Today's card is a simple stamping project using the Needle & Thread stamp set. I ended up creating my own DSP using this set, with a vintage look to it. Here's what I made...
I created my DSP  background by stamping my images all over a piece of Crumb Cake cardstock (4" x 5 1/4"). I used Merry Merlot, Cajun Craze and Mossy Meadow ink pads for stamping. I then die-cut a circle piece of Crumb Cake cardstock using my Stitched Shapes framelits and stamped my sentiment on it using Merry Merlot. I added some Rose Metallic Thread at the back of my sentiment piece before adhering it onto my DSP piece using dimensionals. Lastly I wrapped a piece of Mossy Meadow twine (from the retired Festive Farmhouse collection) around my DSP piece and added a little bow before adhering it to my Cajun Craze card base (A2 size). 

For a little bit of shimmer (coz' I love my shimmer!) I just added some Wink of Stella on the centers of my flowers and then added some glitter enamel dots as well. And that is my super simple card for the day! Thanks for dropping by and see ya next time! Happy crafting!

Sunday, March 10, 2019

Shimmery Lovely Lattice

I have been playing around with my Lovely Lattice stamp set from Sale-a-bration, trying to find the best medium to color the beautiful image. I've tried my alcohol markers, watercolor pencils, even Brusho! Although these worked just fine, I just wasn't satisfied. I wanted something else...something different. Enter the shimmer paints!

Yes, I colored my image with shimmer paints! I love anything sparkly anyway, so this is the perfect solution. The images just popped with these paints, and I am very satisfied with the end result.
For my card I started by white heat-embossing my images on a piece of Night of Navy cardstock. Then I colored them in using my Aqua Painter and various shimmer paints (some are now retired): Frost White, Vegas Gold and Bright Copper. Once colored in I cut out my images. I also white heat-embossed my sentiment from the Rooted in Nature stamp set before fussy cutting it.
Next I ran a piece of Night of Navy cardstock (4" x 5 1/4") through my Big Shot with my Subtle embossing folder for added texture. I then wrapped a Silver Metallic Ribbon around my card before gluing down my images. I adhered my sentiment last using dimensionals. This whole piece was then added on to my Smoky Slate card base (A2 size) using more dimensionals, and added a few Pearl Basic Jewels for embellishment.

And that is my card for today, simple coloring for the gorgeous lattice image! Quick and easy, no shading needed, with maximum impact...gotta love that! I hope you guys liked today's project and thank you for stopping by today. Hope to see you next time, happy crafting!

Saturday, March 09, 2019

Sweet Hello Cupcake

Today I am inspired by Global Design Project's challenge of the week...sweeter than candy! This challenge gave me the chance to play with my Sale-a-bration item, the Hello Cupcake stamp set. Here's what I came up with...
Because of the theme for this challenge, I wanted to create a fun and playful card with lots of vibrant colors. And so for the cupcakes I used the following ink pads: Lovely Lipstick, Early Espresso, Bermuda Bay, Flirty Flamingo and Mango Melody. I stamped my cupcake and used my Aqua Painter to spread the ink out, and then fussy cut my images.
My circles are die-cut pieces using the Stitched Shapes Framelits and Mango Melody, Smoky Slate and Bermuda Bay cardstock

To put my card together I adhered a piece of the Share What You Love DSP on a piece of Whisper White cardstock (4 1/8" x 5 3/8"). Then I added my stitched circles and mounted my cupcakes using dimensionals. I wrapped a ribbon along the edge of my DSP and added a bow (I used a retired Bermuda Bay ribbon from past SAB). Next I added my cupcake topper by creating a banner using Flirty Flamingo cardstock and wrapping it around a toothpick. This whole card front was then adhered to my Whisper White card base (A2 size).

To finish off my card I added flowers to my cupcakes from the same stamp set, covered them with Wink of Stella for some shimmer, and topped them with Happiness Blooms enamel dots. I couldn't resist adding more shimmer to my card so I covered my cupcake topper with some Wink of Stella as well!

And that is my project for today, a sweet and playful birthday card. Hope you guys liked it. Thank you for stopping by today and hope to see you next time. Happy crafting!

Saturday, March 02, 2019

Easter Bunny

Are you a crafting hoarder like me? I do NOT like throwing crafty stuff away, and so I ended up with a lot of scraps! Today, I wanted to make use of some of these scraps and created this Easter card...
I used scrap pieces of cardstock in Pool Party, Coastal Cabana and Bermuda Bay.
Slathered glue on a piece of Whisper White cardstock and adhered my scrap pieces.
Trimmed my piece to 4" x 5 1//4" then ran through my Big Shot with the Dot to Dot embossing folder.
Sponged my embossed piece with the Frost White shimmer paint to mute my colors a little bit and at the same time add some sparkle.
I cut up notches at the top and bottom and wrapped my Whisper White Classic Weave Ribbon and layered the pretty Coastal Cabana ribbon from the Tea Room Ribbon combo pack.

Moving on to my bunny, I stamped my image from the Fable Friends set in Memento black ink on a scrap piece of Whisper White cardstock. After coloring my bunny, I cut it up using one of the oval dies in the Stitched Shapes Framelits. I then layered this piece on top of a bigger oval in Whisper White. Lastly I added my sentiment piece which is from the same stamp set.

This whole piece was then just adhered to my Whisper White card base (A2 size) using Foam adhesive strips for dimension. 

And that is how I created this simple and adorable Easter card! I think that the Dot to Dot embossing folder and the Fable Friends stamp set is such a perfect match! Hope you guys liked it and thanks again for stopping by today. See ya next time, happy crafting!


Saturday, February 23, 2019

February Blog Hop: Sale-a-bration

Hello and welcome to this month's Ink.Stamp.Share blog hop. Today we are celebrating Sale-a-bration!!! What an awesome event for crafters this is because you get to choose free stuff from an array of absolutely beautiful SAB items for your qualifying purchase! Need more info on this awesome event? Just let me know and leave a comment below.

For my project I put together this card:

I used the Lasting Lily stamp set, my absolute favorite SAB item! This gorgeous set was a must-have for me, I couldn't wait to create something with it. The flowers are just stunning and with beautiful sentiments to match. And because this is a Distinktive set, your stamped images also have more depth to them. Just beautiful!
To make my card I started by stamping my flowers and leaves on a piece of Whisper White cardstock using Merry Merlot and Old Olive ink pads. After cutting my images I moved on to creating my background piece. I stuck a piece of DSP from the Botanical Butterfly DSP collection (another SAB item!) at the bottom of a piece of Basic Black cardstock (4" x 5 1/4"). Then I cut the center out using my Rectangle Stitched Framelits.
Next I added my layering pieces using another SAB item, the Lovely Lipstick Foil Sheets (unfortunately these are all sold-out now). After gluing my pieces together, it was just a matter of adding my lilies and leaves in the center, arranging it into a nice bouquet. Then I added my sentiment which was white heat-embossed on a strip of Basic Black cardstock, propping it up using some dimensionals.

I then added some embellishments using the Basic Rhinestone Jewels and yet another SAB item, a bow made from the Organdy ribbon. I also had to have some shimmer (of course!) so I added some Wink of Stella onto my lilies. The whole card front piece was then adhered to my Whisper White card base (A2 sized). 

And that is my project for today's blog hop...I hope y'all liked it. I really enjoyed playing with my SAB items, they're all just beautiful! Don't forget, Sale-a-bration only runs til the end of March, so you better act now if you want any of these freebies! 

Keep on hopping along with us and see the beautiful projects of the rest of the very talented team at Ink.Stamp.Share. Thanks for stopping by and happy crafting!

Roll Call List


Thursday, February 21, 2019

Puppy Love

I am a huge dog lover. And so when Stampin' Up! released another stamp set with dogs, I just had to buy it. Add to the bundle a dog punch and I'm in seventh heaven! :)

So today I got to play with the adorable Happy Tails bundle and made this simple card. 
To make my card I started with the star of the show, the dog! I stamped the outline of the dog in Memento Tuxedo Black ink, then white heat-embossed the spots. To color the dog I used my Pumpkin Pie and Crumb Cake ink pads and AquaPainter to start, then added some brown using my Early Espresso watercolor pencil for some shading. Cutting out my image was easy with the help of the coordinating Dog Builder Punch.

I cut the butterfly out from the Sale-a-bration item Botanical Butterfly DSP using the Butterfly Duet punch. I then glued down my dog and butterfly on a piece of Smoky Slate cardstock that I cut out using the Rectangle Stitched Framelits. (I trimmed my piece down to a smaller rectangle to fit my dog better.)

Next, the sentiment was white heat-embossed on a square piece of Night of Navy cardstock that I cut out using the Stitched Shapes Framelits. Then I just added a paw print with the sentiment piece, for fun!

To put my card together I used Smoky Slate (A2 sized) for my card base. I then added a layering piece of DSP from the Needlepoint Nook collection (4" x 5 1/4"). Next I wrapped some Silver Baker's Twine around my dog piece before adhering it onto my card. Finally my sentiment piece is added using dimensionals

And that is my super simple card for today, hope you liked it. My adorable dog Tayla was the inspiration behind this card. I didn't quite capture her likeness in this card, but close enough! :) Hope to see you next time and happy crafting!


Sunday, February 17, 2019

Colorful Butterflies

Hello and welcome. Today I got to play with the pretty butterflies from the Sale-a-bration item Botanical Butterfly DSP, and oh what a pretty collection of paper this is! Here's what I created...
I was inspired by this week's Global Design Project challenge 176...CASE the Designer. Steffi Helmschrott designed a gorgeous card with vibrant colored circles, and these are what inspired me in creating my card. 
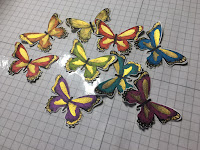
I started by coloring my pretty butterflies using the colors of the rainbow. I don't own the Blends (yet), so I just used my ink pads and my Aqua Painter. For my colors I used the following: Real Red, Pumpkin Pie, Pineapple Punch, Granny Apple Green, Bermuda Bay, Gorgeous Grape and Blackberry Bliss. I also colored the centers of my butterflies using the Vegas Gold Shimmer Paint (unfortunately now retired), because butterflies need some sparkle of course! :) After coloring I used my Butterfly Duet punch to easily cut them out.
My mat layer is a piece of Basic Black cardstock (5 1/4" x 4") which I ran through my Big Shot with the Dot to Dot embossing folder. For additional interest I sponged it with the Vegas Gold shimmer paint to match my butterflies. My sentiment is from the Butterfly Gala stamp set, which I gold heat-embossed on a strip of Basic Black cardstock.

To put my card together, I adhered my mat layer onto my Basic Black A2 sized card base. Next I added my butterflies along the left side and my sentiment piece using dimensionals. And just like that, my card is done!
I just adore butterflies, I think they are just gorgeous! And I couldn't be happier that we have tons of pretty butterflies to play with from both the Occasions and Sale-a-bration catalogue. Thank you again for stopping by today, and see you next time! Happy crafting!